How to Connect a Barcode Printer to Wi-Fi (Step-by-Step Guide)
Connecting a barcode or thermal label printer to Wi-Fi allows multiple computers, POS systems, or mobile devices to print without using USB cables. The process usually involves connecting the printer to your router first, then adding it to your device using its IP address or driver software.
This guide explains the most reliable methods used by common barcode printer brands such as Zebra, Brother, and HPRT.
Quick Answer
To connect a barcode printer to Wi-Fi:
1. Enable Wi-Fi on the printer.
2. Select your Wi-Fi network (SSID) and enter the password.
3. Confirm the printer shows Connected.
4. Print or view the network configuration page to find the printer’s IP address.
5. Add the printer on your computer or phone using the IP address or manufacturer driver.
Most barcode printers support menu setup, mobile apps, or Wi-Fi Direct configuration.
Step 1: Check Your Printer and Network
Before starting the setup, confirm a few details.
You will need:
• A barcode or thermal label printer with Wi-Fi capability
• Your Wi-Fi network name (SSID)
• Your Wi-Fi password
• A computer or smartphone for setup
Important compatibility note
Many barcode printers support 2.4 GHz Wi-Fi only. If your router broadcasts both 2.4 GHz and 5 GHz networks, make sure the printer connects to 2.4 GHz.
Also verify whether your printer uses:
• Built-in Wi-Fi
• Ethernet connection through a wireless router
• Bluetooth-assisted setup
Step 2: Connect the Printer to Wi-Fi
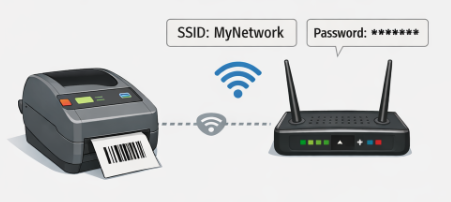
Barcode printers typically support three setup methods.
Method 1: Use the Printer's Screen or Buttons
Many desktop barcode printers include a network setup menu.
Steps:
1. Turn on the printer and load labels.
2. Open the printer Menu / Settings.
3. Navigate to Network → WLAN / Wi-Fi settings.
4. Turn Wi-Fi ON.
5. Choose Scan for Networks.
6. Select your Wi-Fi SSID.
7. Enter the Wi-Fi password.
8. Confirm and wait for Connected status.
A Wi-Fi icon or connection message usually appears when the printer joins the network.
Method 2: Use a Printer Setup App
Many manufacturers provide configuration apps for smartphones or computers.
Examples include:
✅ Zebra Printer Setup Utility
✅ Brother Printer Setup Tool
✅ Manufacturer-specific mobile apps
Typical process:
1. Install the printer setup app.
2. Turn on the printer.
3. Enable Bluetooth discovery if required.
4. Open the app and tap Find or Discover Printer.
5. Select your printer.
6. Enter your Wi-Fi network name and password.
7. Apply settings and wait for the connection confirmation.
This method is common for portable barcode printers and mobile label printers.
Method 3: Use Wi-Fi Direct or Access Point Mode
Some barcode printers create a temporary wireless network for configuration.
Steps:
1. Turn on the printer.
2. Enable Wi-Fi Direct / AP Mode / Hotspot mode.
3. On your computer or phone, open Wi-Fi settings.
4. Connect to the printer’s temporary network
(example: DIRECT-Printer or ARKSCAN-2054K)
5. Open a browser or setup tool provided by the manufacturer.
6. Enter your home or office Wi-Fi SSID and password.
7. Save the settings.
8. Reconnect your device to the normal Wi-Fi network.
The printer will then join the same network.
Step 3: Find the Printer’s IP Address
After the printer connects to Wi-Fi, you usually need its IP address to add it to your computer.
You can find it in several ways:
Print a network configuration label
Most printers can print a network report using a button combination or menu option.
The label usually includes:
• IP address
• MAC address
• Wi-Fi network name
Example:
IP Address: 192.168.1.85
Check the setup app
Many printer setup utilities display the IP address in device information.
Check your router
You can also view connected devices in your router admin panel.
Step 4: Add the Printer to Your Computer
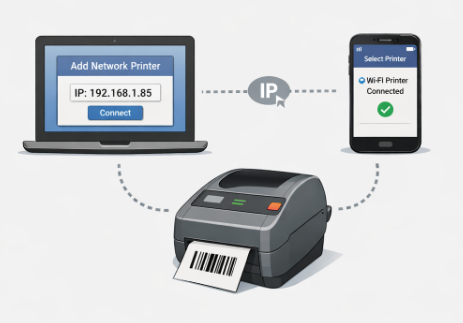
Once the printer is on the same Wi-Fi network, install it on your device.
Windows
1. Install the manufacturer’s printer driver.
2. Open Settings → Bluetooth & devices → Printers & scanners.
3. Click Add device.
4. If the printer does not appear automatically, choose:
Add manually → Add a printer using TCP/IP address
5. Enter the printer’s IP address.
6. Complete the driver installation.
macOS
1. Install the required printer driver.
2. Open System Settings → Printers & Scanners.
3. Click Add Printer.
4. Select the IP tab.
5. Enter the printer IP address.
6. Choose the protocol (usually IPP or LPD).
7. Add the printer.
Smartphones or Tablets
Many mobile workflows print through apps such as:
• Shipping platforms
• Inventory systems
• Manufacturer utilities
• Make sure:
• Your phone is on the same Wi-Fi network.
• The app can detect the printer under network devices.
Step 5: Test the Printer
After installation, print a test label.
You can test printing by:
• Using the printer’s built-in test button
• Printing a test label from the setup app
• Sending a label from your POS or shipping software
If the label prints correctly, the Wi-Fi setup is complete.
Troubleshooting Wi-Fi Barcode Printer Issues
If the printer fails to connect or appear on the network, check the following.
Verify Wi-Fi frequency
Ensure the router supports 2.4 GHz, since many barcode printers do not support 5 GHz networks.
Check Wi-Fi password
Incorrect credentials are the most common cause of connection failure.
Disable network isolation
Guest networks or VLAN isolation may prevent devices from seeing each other.
Add printer by IP
If automatic discovery fails, manually add the printer using its IP address.
Restart devices
Reboot the printer, router, and computer to refresh network connections.
Final Thoughts
Connecting a barcode printer to Wi-Fi usually takes only a few minutes once you know the process:
1. Enable Wi-Fi on the printer
2. Connect it to your network
3. Find its IP address
4. Add the printer to your device
After setup, your barcode or label printer can be shared across multiple systems, making it ideal for retail, warehousing, logistics, and shipping operations.