How to Make Clothing Tags In-House: Thermal Transfer Printer & Care Label Guide
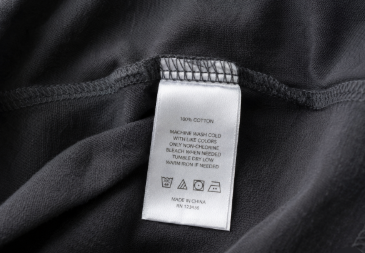
Outsourcing apparel tags works well enough until a retail partner demands custom UPC barcodes by Friday morning. Waiting two weeks for an overseas supplier to correct a single typo on a care label can halt distribution and stall cash flow.
Modern apparel brands, warehouse fulfillment teams, and garment factories solve this bottleneck by bringing tag production in-house. Using dedicated thermal transfer label printers, you can produce retail-ready cardstock hang tags and durable fabric care labels on demand. This guide covers the hardware, consumables, and production workflows needed to set up a reliable in-house printing station.
Why Print Clothing Tags In-House Instead of Outsourcing?
Flexibility is the primary driver.
Garment production involves constant data changes across dozens of SKUs. A single production run often requires different size marks, localized language translations, updated retail pricing, and unique 1D or 2D barcodes.
Operational Metric | Outsourced Trim Supplier | In-House Barcode Label Printer |
Lead Time | 7 to 15 business days | Real-time (under 5 minutes) |
Minimum Order Quantity (MOQ) | 1,000 to 5,000 pcs per SKU | 1 label (zero MOQ) |
Variable Data Agility | High reprint cost on changes | Instant dynamic database updates |
Average Unit Cost (estimated) | $0.15 – $0.45 | $0.02 – $0.05 |
With an in-house system, your team feeds live spreadsheets directly to the printer. You eliminate pre-printed inventory waste, bypass supplier setup fees, and respond immediately to sudden SKU updates.
What Printer Types, Ribbons, and Substrates Are Required?
Direct thermal printers are unsuitable for clothing tags. Direct thermal paper reacts to heat and UV exposure—it turns black under a home iron and fades quickly under retail lighting.
Thermal transfer technology is the industry standard. A heated printhead melts specialized wax or resin ink from a ribbon onto the tag material.
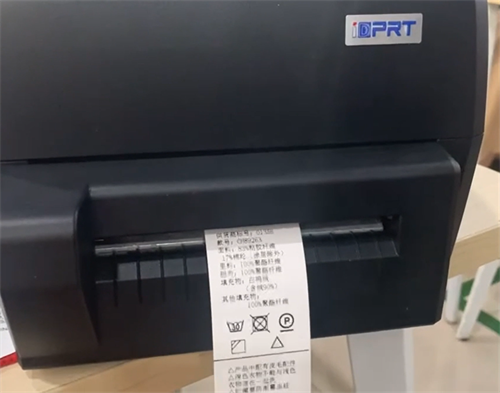
Recommended Thermal Transfer Printer for Wash Care Labels: iDPRT iT4X
For small-to-medium apparel businesses producing custom fabric tags and wash-care labels, the iDPRT iT4X desktop thermal transfer barcode printer is a popular choice. It offers high print precision for care symbols and fine text, and with a rotary cutter module delivers clean cuts on satin and nylon ribbons—enabling professional wash labels on demand with improved efficiency.
Matching the wrong ribbon to fabric can ruin entire production batches.
Tag Application | Recommended Substrate | Compatible Ribbon Formula | Required Sensor Type |
Price & Outer Hang Tags | 250–350 GSM Cardstock (Uncoated/Matte) | Premium Wax/Resin Hybrid | Reflective (Black Mark) or Notch |
Soft Sew-In Care Labels | Slit-Edge Polyester Satin Ribbon | Wash-Care Textile Resin | Transmissive (Gap) or Continuous |
Crisp Sew-In Care Labels | Coated Nylon Taffeta Tape | High-Density Textile Resin | Continuous with Software Cut Length |
Tagless Iron-On Labels | Heat-Seal Polyamide Film | Extreme Industrial Resin | Reflective Black Mark |
Important note: Standard packaging resin ribbons will wash out. For fabric labels, you must use Wash-Care Textile Resin. This formulation bonds tightly into synthetic threads and withstands heavy laundry agitation, dry-cleaning solvents, and high-heat drying cycles.
What DPI and Hardware Modules Do You Need for Care Labels and Hang Tags?
Most desktop barcode label printers ship with a 203 DPI printhead. This resolution handles large shipping labels adequately but struggles with apparel care tags.
Care labels pack dense information into tight spaces—4pt to 6pt legal text alongside intricate ISO 3758 wash symbols. At 203 DPI, these symbols print with jagged edges and small characters often merge into unreadable spots.
· 203 DPI: Adequate for large outer hang-tag barcodes, but blurs micro-text and wash icons.
· 300 DPI: The commercial standard for clothing tags. It delivers sharp 5pt fonts, clean 2D Data Matrix codes, and crisp care symbols.
· 600 DPI: Designed for ultra-fine micro-type, localized Asian characters, and luxury jewelry or lingerie tags.
Essential hardware add-ons:
· Rotary Cutter Module: Tearing woven or synthetic ribbon by hand leaves frayed edges. An automated rotary cutter slices satin and nylon cleanly to the specified length after each print.
· Movable Black Mark Sensor: Hang-tag cardstock often uses punched holes or black timing marks. A movable sensor allows precise alignment of the printhead to the cut line.
· External Media Stand: Heavy rolls of 350 GSM cardstock or 200-meter textile rolls frequently exceed the internal capacity of compact printers. An external stand feeds large rolls smoothly without straining the feed motor.
How to Set Up an In-House Clothing Tag Printing Workflow
A reliable printing station requires four straightforward steps.
1. Build the Master Template
Open professional label design software such as BarTender, NiceLabel, or ZebraDesigner. Create a fixed layout for your logo, margins, and standard borders. Keep all text at least 1.5 mm from the edge to accommodate minor feed drift during high-speed runs.
2. Connect Your Product Database
Link variable text fields to an Excel, CSV, or ERP database. Automate changes for:
· Garment size (XS through XXL)
· Fiber content percentages (e.g., 95% Organic Cotton, 5% Elastane)
· Country of origin disclosures
· Live barcode generation (UPC-A for retail POS or Code 128 for warehouse picking)
3. Dial In Heat and Speed Settings
Textile resin requires higher energy than standard shipping-label wax.
Set print speed between 2 and 4 inches per second (IPS). Higher speeds often produce faded or patchy transfers.
Gradually increase the print darkness setting until solid black graphics appear dense and sharp. Avoid excessive heat, which can burn through delicate satin ribbon.
4. Cut and Scan-Verify
Print a test batch of five labels. Immediately scan the barcodes with a handheld 2D imager. If the scanner hesitates or misreads, adjust printhead pressure and ribbon tension before running the full batch.
How to Test Wash Resistance and Durability of Fabric Care Labels
A printed label must survive real-world use. If laundry detergents remove care instructions, the garment may violate trade compliance rules in major markets such as the US (FTC 16 CFR Part 423) and the EU.
In-house quality test:
· Machine Wash Test: Run three test labels through five continuous wash cycles following ISO 6330 standards at 40°C to 60°C using standard commercial detergent. Tumble dry after each cycle.
· Solvent Rub Test: Dip a cotton swab in isopropyl alcohol or dry-cleaning solvent (perchloroethylene). Rub firmly across the printed text for 30 seconds.
· Visual Inspection: Check for edge bleeding, flaking, or faded barcodes. If the ink breaks down, reduce print speed or switch to a higher-density textile resin ribbon.
Summary Checklist
In-house tag printing provides complete control over price tickets, retail barcodes, and legal wash-care labels.
Equip yourself with a 300 DPI thermal transfer printer, use Wash-Care Textile Resin for fabric labels, install an automatic rotary cutter, and connect your templates to live spreadsheets. You eliminate stockouts, reduce lead times to zero, and keep garment lines moving on schedule.