Beginner’s Guide: What to Consider Before Printing Your First Asset Barcode Label

Labeling company equipment with asset barcode labels is one of the simplest ways to keep track of tools, computers, devices, and everyday office or warehouse items. For beginners, printing asset labels may seem straightforward, but a few basic decisions will determine how well your labels perform in real use.
This guide explains what to consider before printing your first asset barcode label and how a barcode printer helps you create clear, durable, and scan-ready identification tags.
What Is an Asset Barcode Label?
An asset barcode label is a small sticker that contains a barcode and basic information used to identify a physical item. When scanned, the barcode reveals the asset’s ID and links it to a database, spreadsheet, or asset management system. These labels are commonly placed on laptops, tools, machinery, office furniture, lab equipment, or any item a company wants to track.
Asset barcode labels make it easy to record ownership, reduce loss, and organize equipment without relying on handwritten tags.
Key Things to Consider Before Printing Your First Asset Barcode Label
Before you start printing asset labels, take a moment to plan the basics. The better your labels are designed, the easier they will be to scan and manage later.
1.Decide What Information to Include
A beginner-friendly asset label does not need to be complicated. Most companies choose:
• A unique asset ID
• The asset name or department
• Optional details such as purchase date, serial number, or location code
The clearer the information, the easier it is to manage assets over time. A simple structure also reduces clutter and keeps the barcode easy to scan.
2.Choose the Right Barcode Type
You don’t need deep technical knowledge to pick a barcode type. For most beginners:
• Code 128 is the most common and easiest for asset tracking
• QR Code works when you want users to scan with phones
• DataMatrix fits very small labels or tight spaces
Your asset barcode label should be easy to read and compatible with your scanning method or asset software.
3.Select a Suitable Label Material
Label material affects durability more than beginners expect. Before printing, decide where the asset will be used:
• Paper labels → good for light indoor use
• Polyester/PET labels → durable, long-lasting, great for equipment
• Tamper-evident labels → ideal for IT assets or sensitive equipment
• Outdoor or harsh environment labels → heat-, water- or chemical-resistant
Matching the material to the environment ensures the barcode stays readable.
4.Pick the Right Barcode Printer
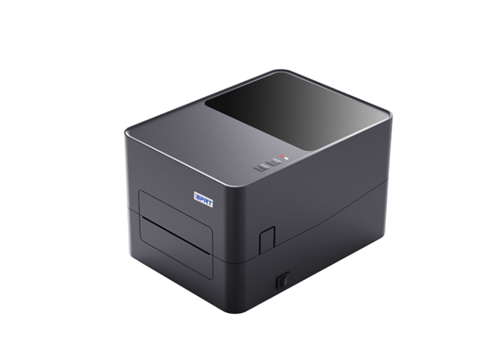
A proper barcode printer makes asset label printing much easier. For beginners, two printing technologies are common:
• Direct thermal printers → simple and low maintenance, but labels fade over time
• Thermal transfer printers → print durable, long-lasting asset labels with excellent clarity
Most companies choose a thermal transfer barcode printer for asset tagging because it offers better print quality and longevity.
A resolution of 203 dpi works for basic labels, while 300 dpi provides sharper barcodes for small asset tags.
Desktop barcode printers are a good match for everyday asset labeling because they are compact, reliable, and easy to use.
5.Make Sure the Barcode Is Easy to Scan
Even beginners can check a few simple details to ensure the barcode is scan-friendly:
• Keep the barcode size reasonable—neither too small nor extremely large
• Maintain a clean white border (quiet zone) around the barcode
• Use dark text on a light background for high contrast
• When labeling curved or textured surfaces, use flexible labels designed for good adhesion
Testing one printed label with a scanner before mass printing helps avoid common mistakes.
Simple Step-by-Step Workflow for Printing Your First Asset Label
You don’t need advanced software or technical skills. Follow this basic workflow:
1.Assign a unique asset ID
2.Create a simple label design using any barcode label software
3.Load the correct label material and ribbon (if using thermal transfer)
4.Set print density and resolution in your barcode printer
5.Print a sample label and scan to confirm readability
6.Apply the label to a clean, dry surface
7.Record the asset in your system (Excel, asset management tool, or ERP)
This lightweight process works for individuals and small teams just getting started.
Common Beginner Mistakes to Avoid
Beginners often run into avoidable issues such as:
• Labels that peel off because of poor surface preparation
• Barcodes that are too small or overly compressed
• Low-contrast prints from using the wrong printer settings
• Reusing or duplicating asset IDs
• Choosing flimsy label material for heavy-use equipment
Avoiding these mistakes helps your asset barcode label system stay clean, organized, and reliable from the start.
Conclusion: Start Simple and Print Smart
Printing your first asset barcode label doesn’t require deep technical skills. By choosing the right information, label material, barcode type, and barcode printer, you can create clear and durable labels that make asset tracking far easier. A few simple decisions at the beginning set the foundation for a reliable, scan-friendly asset labeling system that works for any business.
Recent posts
Previous article