203 vs. 300 vs. 600 DPI: Choosing the Right Resolution for Industrial Printers
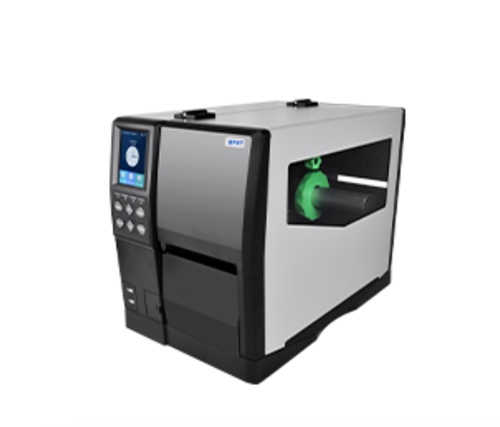
When procuring a new industrial thermal printer, one specification often causes the most confusion: DPI (Dots Per Inch). It’s a classic Goldilocks problem. Choose a resolution too low, and your barcodes may become unreadable, halting your production line. Choose a resolution too high, and you are overspending on hardware and sacrificing print speed.
Whether you are printing standard shipping labels or tiny circuit board tags, this barcode printer DPI guide will break down the differences between 203, 300, and 600 DPI, helping you match the spec to your specific application.
What Does DPI Actually Mean in Thermal Printing?
DPI stands for Dots Per Inch. Thermal printheads consist of a single row of tiny heating elements. A "203 DPI" printer has 203 of these heating elements across every inch of the printhead.
● Lower DPI: Larger dots, "jagged" curves on text, faster printing.
● Higher DPI: Smaller, denser dots, smooth curves, slower printing.
While a human eye might tolerate a slightly pixelated font, a barcode scanner is less forgiving. If the "bars" or "spaces" aren't precise, the scan fails.
203 DPI Industrial Printer: The Industry Workhorse
Best for: Shipping labels (4x6), pallet tags, warehousing, and large inventory labels.
For 70% of logistics and warehousing applications, 203 DPI is the standard. It is cost-effective, fast, and generates files that are smaller in size (which matters when sending thousands of print jobs over a network).
If you are printing standard 1D barcodes (like Code 128) that are physically large, 203 DPI offers plenty of clarity.
Industry Case: The Logistics Hub
A regional distribution center processes 15,000 packages daily. They print standard 4" x 6" shipping labels. Speed is their #1 metric.
Why they chose 203 DPI: The scanners used by carriers (FedEx/UPS) have no trouble reading 203 DPI barcodes at this size. More importantly, the 203 DPI printer can run at 12-14 inches per second (IPS), ensuring the labeling line never bottlenecks the conveyor.
Verdict: If your smallest font is size 8 or larger, and your barcodes are standard size, stick with 203 DPI.
300 DPI Industrial Printer: The Versatile Middle Ground
Best for: Asset tags, product labeling, logos, and moderate-sized 2D codes.
The debate of 203 dpi vs 300 dpi usually ends here: Do you need to print a logo? Or slightly smaller text?
300 DPI puts about 50% more dots per inch than 203. This extra density smooths out the curves in fonts and logos. More critically, it allows you to print 2D barcodes (like QR codes or Data Matrix) at a smaller physical size while maintaining readability.
Many businesses are migrating to 300 DPI as their new "standard" because it offers flexibility. If a customer suddenly requests a label with a dense QR code, a 300 DPI printer can handle it, whereas a 203 DPI unit might struggle.
Industry Case: The Auto Parts Distributor
A supplier of automotive filters needs to stick 2" x 1" labels on small boxes. The label requires a company logo, a part number, and a Data Matrix code.
Why they chose 300 DPI: On a 203 DPI printer, the small company logo looked like a blurry blob, and the Data Matrix code had fused edges, causing scan errors. Upgrading to 300 DPI made the text crisp and the code scannable, without a massive jump in hardware cost.
Verdict: If you need brand presentation (logos) or need to print labels smaller than 2 inches, 300 DPI is the safe bet.
600 DPI Industrial Printer: The Precision Specialist
Best for: Micro-electronics (PCB), jewelry, medical vials, and tiny security labels.
This is the territory of the high resolution industrial printer. 600 DPI is a specialized tool designed for applications where space is at an absolute premium.
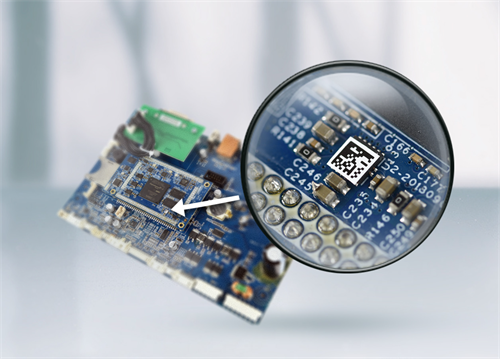
When printing small QR codes—we are talking about codes as small as 3mm x 3mm—600 DPI is mandatory. At this size, a "dot" on a 203 DPI printer is almost as big as the data module itself, rendering the code impossible to create. 600 DPI allows for microscopic precision.
Industry Case: Electronics Manufacturing (PCB)
A manufacturer produces smartphone motherboards. They need to place a tracking label on a heat sink that is only 5mm x 5mm.
Why they chose 600 DPI: They attempted to use a 300 DPI printer, but the high-density QR code was unreadable. The "quiet zones" (white space) around the code were too jagged. Only a 600 DPI printer could render the micro-code sharply enough for the automated optical inspection (AOI) cameras to read it during assembly.
Verdict: If your label is smaller than a fingernail, or your text is smaller than size 6, you need 600 DPI.
The Hidden Trade-off: Speed and Cost
Before you decide to "future-proof" your facility by buying 600 DPI printers for everything, consider the downsides.
1.Print Speed: Resolution and speed have an inverse relationship. A printer that runs at 14 IPS at 203 DPI might drop to 6 IPS or 4 IPS at 600 DPI. The printhead simply needs more time to heat up that many dots.
2.Printhead Cost: The printhead is a consumable part. A 600 DPI printhead can cost 2x to 3x more than a 203 DPI version. If you are printing shipping labels at 600 DPI, you are burning money.
3.Data Processing: Higher resolution means larger image files. In high-speed automated environments, sending massive 600 DPI print jobs can sometimes cause slight data lag.
Don't over-spec your printer. For most warehouses, the speed and economy of 203 DPI remain unbeaten. However, if your operations are shifting toward traceability requiring dense 2D codes, 300 DPI is the modern versatile standard. Reserve 600 DPI only for specific micro-labeling tasks.
Matching the DPI to your specific application doesn't just save hardware costs—it ensures your labels scan correctly the first time, every time.